Beauty In Lagos

First for all things Beauty, in Lagos!

Most Viewed This Week

Recent Posts

ad

Tuesday, 16 June 2015

Ez BEAUTY TIPS | HOW TO CARE FOR YOUR HAIR EXTENSIONS

Hi Everyone!

Before I get into this post, I have got some exciting news to share... Over the course of being a blogger, I have received requests to guest post on sites or write an article for a publication, but I never felt confident enough to do it at the time. And the one time I committed to one such request, it was a terrible fail!

This time round I feel confident enough to share my beauty knowledge and I am praying I will do a good job :). Below is the product of my first contribution.

StyleMeAfrica is a site that celebrates all things African fashion and style, and they approached me to infuse some beauty for the month of June. My first post is about how to care for your hair extensions, I have already talked about this here on the blog, but with this post I provided step-by-step instructions and added more details. Enjoy!

Step 1: Condition


I like to start with the extensions dry. I read somewhere that you should look at hair strands like you would a sponge. When dry, a sponge is better able to absorb more liquid, than if it were used to accomplish the same task when wet. Same applies with hair extensions, starting the cleansing process with them dry causes the strands to benefit a lot better from the products being used.
First things first, tie up your bundles using a rubber band (you may use a hair band if you prefer), tie the band as close to the weft as possible. Then proceed to apply a moisturizing conditioner of your choice, distributing this evenly through the strands, avoiding the weft. Run a wide-toothed comb through to further ensure the conditioner is distributed evenly. Once you have completed all the bundles you pop them all in a carrier bag or covered in a bowl, and leave to sit for about 15-30mins. Dependent on how damaged/dry your extensions are, you can deep condition using heat by placing them in a microwavable bowl and popping that in the microwave for about 2mins, then let it sit out for another 10mins. Ensure you don’t leave the conditioner in the extensions for too long.
Product –The conditioners I recommend are: Herbal Essences, Tresemme or Hairven. But feel free to use whatever good moisturizing conditioner you have.

Step 2: Shampoo & Rinse


To rinse, you will begin with a shampoo. Apply some shampoo to the wefts, add some water just to the wefts to get some suds going, then wash using the palm of your hand going over the weft in circular motion. Focus the shampoo on just the wefts, and once you feel you’ve washed enough then rinse.
Rinse holding the weft under the faucet and letting the water run through the bundle. The shampoo being rinsed downwards from the weft through the actual extensions, allows it also work through. Run your free hand downwards, over and over in one direction, until you rinse out all the shampoo and conditioner. You will not need to apply the shampoo directly to the hair strands, shampoos can be stripping/drying and we don’t want that. The shampoo running through from the weft is enough to get the job done, trust me
Product – Shampoos I recommend are pretty much the same brand as the conditioners I listed above.
Step 3 Air-Dry:


You should air-dry your extensions by laying them out flat or hanging up on a laundry line. You can spritz some moisturizing leave-in conditioner if you must. A small amount of leave-in, do not drench. If you are in a rush, you may use a hand-dryer after spritzing the extensions with some heat protectant. If you use heat protection, you won’t need a leave-in, too much product will weigh the hair down. So bear in mind that if you don’t feel you need to use a leave-in, please skip that step.


This cleansing steps will work if you have a weave installed. Just apply the conditioner to dry hair as normal and cover with a plastic cap. To shampoo and rinse, dilute some shampoo in an applicator bottle or spray bottle and apply directly to the wefts and plaits on your scalp. Make sure you get every line. This will help cleanse the wefts and as your scalp as well. Rub your fingers through each plait, just to work the shampoo in, and then rinse through as normal.

Laters,

Ez xxX
Share:

Thursday, 25 September 2014

ANNE ELISE REAL HAIR | HAIR REVIEW - FilipinoCambodian Blend


Hey Guys!

A big THANK YOU to all the ladies that left a comment on my last post! I honestly didn't really expect anyone to enter the competition, don't ask me why. But I have picked a winner and I will be contacting you via the email address you provided!

So on to this post, Anne Elise Real Hair (AERH) isn't a newbie to BiL. I actually did my first ever review of their extensions last year here and I am delighted to say they have not slacked one bit in terms of quality. My last review was more in-depth than this, so you can read that one as well.


This is the only hair extensions brand which when I go to the salon for an instal or blowdry the stylist always compliments the quality of it. These are the best hair extensions I have tried out so far. But it's all about variety, we want to have options when it comes to pricing but don't want to scrimp on the quality. Never fear, I am on the case for extensions that come up to par with AERH and I will be sure to share. They sent over a new blend just released at the time, Filipino & Cambodian. Now I know zilch about the different sorts of hair on the market, I just want to know if it's good quality, doesn't tangle easily and whether it is versatile.


I decided to go red with the extensions this time and I wanted to get them done professionally. I asked around for good colourists in Lagos and came up with nothing, so decided to send my hair to a fantastic hairstylist based in Amsterdam. Yup, you read that right, I went international with it! When I want something done right, there's no stopping me. I shared details of my colourist via my instagram page (@BeautyInLagos), so you can get all the information on that over there.


I LOVED the results. The hair took to the colour really well and there was no patchiness of any sort. Just nice even tones all through. This is the hair in its near natural state. I had gone in for a blowdry the day before, but attended a party in the evening so that completely obliterated my fresh blowdry. And this was the state, the day after. I had just brushed it through with a paddle brush. The bit of hair you can see at the top that's a little frizzy is a closure I got from a different vendor. You can see that the AERH underneath still has a bit of curl to it.


In the picture above I curled the hair myself using a curling wand (the brand of the wand is Remington). These curls last literally a week! The versatility of this hair is second to none. It can be worn straight or curled.

So would I recommend this hair? Absolutely!

For details on how to order check out their listing on The BiL Directory or my last post about AERH.

Laters,

Ez xxX
Share:

Thursday, 13 March 2014

CANDY LOCKS - Virgin Hair Review

Hi Hi Hi!!

Here with another hair review for you all and this one should be interesting because I decided to get a little adventurous with my hair, which is something I never do. I like to stay within my comfort zone when it comes to my hair. But I have to say, I am very pleased with the risk I took this time. What's this 'risk' you ask? I decided to try out a VERY different texture of hair this time 'round.... groundbreaking!..... I am so dramatic.

Candy Locks is a virgin hair company currently based in Ghana, with plans to relocate to Nigeria some time in June. Right now their location does not really matter because they ship internationally with majority of their clientele based in Nigeria, UK, Canada and the US. They sell Virgin Brazilian, Peruvian, Malaysian (textures body wave, straight, loose wave and deep wave) and South American curly hair . They also provide lace closures and will introduce silk base closures to their stock very soon.


That's the satin bag my extensions came in! I just love it! And do you notice it's shaped like a 'Candy'... get it? They get an A* from me for their presentation and if you're a regular reader, you already know how I feel about product aesthetics. Ps: in case you didn't know it's best to store your hair extensions in satin bags/pouches/wraps, this not only protects them from getting dusty and all jacked-up from the different elements in the air, the satin aids in preserving the hair.


This is 1x18" and 2x20" Candy Locks Virgin South American* curly hair. The hair came in it's natural state so there were two bundles in 1B-2 and the third was a colour 4.

First impressions
I was not confident that the extensions would provide me with my desired volume, just because I typically install at least 4bundles, and we all know the longer the hair the less 'fuller' the bundle is. But this concern went right out the window after I installed and you'll see why in a minute. I also noticed the hair was a lot softer than I expected. Because of the curly texture, I sort of already assumed it'll  be quite 'coarse'. But it was really soft and light. You can already tell that mentally, I really wasn't ready to believe this hair was going to work for me, but I am very glad I did not allow my numerous doubts take over.


So you already know, first thing's first I needed to dye the hair. I ALWAYS dye my extensions, always! Just because I like my extensions a lot lighter than when they come in their natural state. Also, you should never straight install virgin hair when you get it. Even if you aren't going to dye it, I always advice you co-wash it. Co-wash is just washing your hair with conditioner. I typically apply the conditioner straight to the hair when it's dry, let it sit for like 15-20mins, then rinse it out! I never leave the conditioner in for too long, in this case, because I find the hair to be weighed down after.
I was already going to try out my developer method again (if you have no idea what this 'method' is about, read click here to read that post), but Kaydee (lady behind Candylocks) sent me an email suggesting that I use a regular box dye, because developer tends to really put a strain on the extensions and may cause it to feel dry. So I immediately abandoned my initial idea and popped out to Ebeano supermarket to buy some hair dye.


To achieve my desired colour, I used two different colours of dye. I wanted the bottom half of the hair to be darker than the top. So I used 2 boxes of Creme of Nature hair dye in 'Cinnamon Brown 7.34' for the bottom half.


I then used the 'Ginger Blonde 10.01' to achieve the lighter shade on the top half. This dye actually contains bleach, so I will advise you deep condition the hair right after you have rinsed out the dye. My post on how I dyed my last extensions should help in some way. Oh and my favourite conditioner to use on my extensions is Herbal Essences.


Ta-da! The finished result. Was I pleased with the way the colour turned out, nope! But did I still install, ABSOLUTELY. You can see I kind of achieved the two-tone hue I was going for, just that the contrast is not as obvious as I wanted, not to mention the colours were all wrong. I just wasn't pleased with the actual colour and my application.


In terms of application, I just wish I had gone a little higher with the dye, a little closer to the wefts and wasn't as precise with where the dye ended. Because I don't like how harsh the demarcation line is between the dyed bit and the hair's original colour. And I feel my stylist could've done a better job with how he placed the wefts at my 'part'. See how 'wide' it is, my stylist has got this trick where the part is always very 'closed-in' almost looks like you haven't got a part. He's always been spot-on, but I feel if he had closed the part the way he usually does, it would've looked slightly better! I will definitely be going back in with the dye, might turn this an auburn-red perhaps.


Review
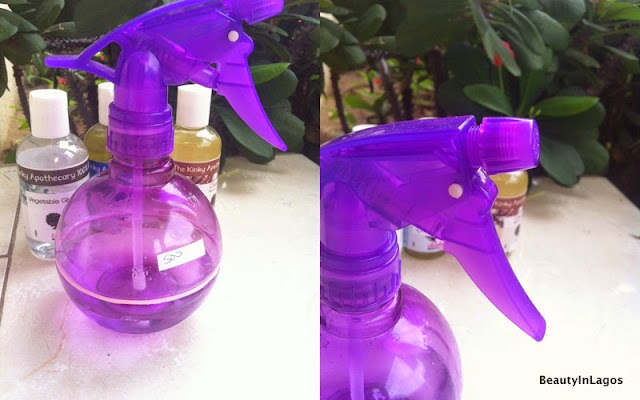
I absolutely LOVE this hair. It does tangle a little bit, but that should be expected with this texture. This hair is for the most part a 'wake-up-and-go' in the morning type situation, but you do need to care for it differently than all the other textures. Because you have to maintain the curls, this hair needs some TLC probably every other day, but it's nothing that will take you way out of your regular morning routine. It needs moisture, and moisture does not translate into slathering on hair serum or 'Pink Oil' (really hope that none of you lovely readers still use this). The best type of moisture for this hair is Water! I decided to give my water a little extra something and threw in some vegetable glycerin. So I mix my water and glycerine in a spray bottle, and just spritz my hair every other day or so. After I have covered every strand (please note not to drench your hair, I'd advise you use a spray bottle, just so you can evenly distribute the water) I then scrunch the hair all the way round in handfuls. 'Scrunching' is simply holding the hair in a fist in your hand and pushing it upwards. This short clip from CandyLock's instagram page should provide the desired visual as I am pants at describing such things with words


So yeah, in summary I loved this hair, it was so stress free and required minimum manipulation which can only be a good thing.  My concerns about it not being 'full' enough were unecessary because as you can see in the picture above, it turned out just right. The quality of the hair is exceptional and I will recommend it to you all. Only regret I have which is becoming quite annoying for me is that I should have conditioned it a little longer after I dyed it. So I strongly advise that you deep condition for at least 30mins after you have dyed your extensions, this applies to me too. There was shedding, but nothing out of the ordinary.

Contact Information

How to order: Place an order by sending an email to askcandylocks@yahoo.com
Textures offered: Virgin Brazilian, Peruvian, Malaysian (textures body wave, straight, loose wave and deep wave) and South American curly hair n.
Lengths Offered: 10" - 28"
Price Range: $240 - $720 depending on the length and number of bundles
Instagram: @CandyLocks_


Hope you enjoyed this review, if you have any additional questions concerning how I dyed the hair leave a comment below and I'll be happy to answer them. If you've got any more questions for Candy Locks just shoot them an email to the address provided above.

Laters,

Ez xxX

Share:

Tuesday, 31 December 2013

MY MAKEUP - Hair Review Part 2 | Install & Final Review


Helloooo beautiful people! Hope everyone's enjoying the holidays and spending quality time with loved ones!

I know quite a few people have been waiting on this review, I even had a couple people email me after the 'Part 1' review (here) went up to ask if this hair extensions were worth their buck.


So I finally installed the extensions. I posted a picture on instagram the day after and it seemed like a lot of girls on there liked what they saw. I have mentioned that reviewing virgin hair extensions is never a straight-forward process. For one thing, no two bundles are exactly the same because the chances are that they will not come from the same donor and secondly, there are a lot of 'phonies' on the market and it is no easy task trying to find a reliable vendor.


One thing I regret with this install is that I only managed to wear the hair in one style, straight. I did plan on curling it at some point but every opportunity I got I felt my look was better suited with straight hair… ah well.


I found that the hair stayed amazing for the first 3-4 days and after that the dryness set in.


I did not take pictures of the hair in that state and typing this post up I am kicking myself for not remembering to. Dryness aside, shedding was at a minimum, nothing out of the ordinary and there was no tangling. In the mornings when getting ready, I did not experience any tangling, I paid close attention to the hair in the back as you know this is where the hair typically tangles up a lot and that did not happen.

All in all, I will say the hair is pretty decent. The dryness is possibly due to my dying process, I should've mixed in some conditioner, but ah well, hindsight is always 20/20 no? I will be terribly honest, for the price-point these hair extensions are worth it. I won't say they are the best extensions I have ever tried, but they are well priced. I will post some pictures on instagram when next I install these again. This time I'll style it curled.


I will be launching an exciting project in the New Year! The main reason I started blogging was to provide anyone with information on where to get their hair done, or wax or thread their brows.


I am in the process of creating a premium online directory for businesses in the Beauty and Lifestyle industries in Lagos (and then Nationwide). I am so excited for this to take-off and I will type up a well-detailed post revealing all! Vendors and businesses expect an email from me early next year!

Just want to wish all you my lovely readers a Happy New Year in advance and a MASSIVE thank you for reading my blog. The support and growth this year has been unbelievable and I honestly do appreciate every single person that reads my blog. I know 2014 will be an awesome year for BiL. And I pray you all get all you want this new year!

All my love,

Ez xxX
Share:

Thursday, 17 October 2013

MYMAKEUP - Hair Review Part 1 | Dyeing


Hi Guys,

I'd like to share with you all a technique I recently used to lift the colour of my hair extensions and at the same time type-up a bit of a review. 
I was recently sent some virgin hair extensions from MyMakeup to try out and review. Apart from makeup products, MyMakeup also sell their own brand of virgin hair extensions called MyHair. I thought rather than type-up a lengthy review of how I got on with these extensions, I'd present the review at different stages. This stage is just all about my first impressions and how it reacted when coloured.

So you all know that virgin hair extensions (Brazilian, Peruvian, Malaysian, etc) are typically black, dark brown or regular brown shades. I personally always dye my extensions to a really light brown/chestnut blonde because my hair isn’t dark and I just prefer my extensions lighter. I typically use hair dye but I decided to just use a Developer first to lift the colour a little, then apply some dye after to attain the exact shade I wanted. I had never attempted this method before, but I was hoping for the best.


So if you want to see how these MyHair Virgin Peruvian Wavy hair extensions went from the pic on the left to what I currently have on the right, then keep reading.

Products & Tools


Like I said I used a Developer. This is a volume 40 developer, you could also use a volume 30 if you like.


A sprush and a salon mixing bowl. I haven’t got a salon bowl, so I used this instead and it worked just as good.


I simply poured my developer into the bowl and used the sprush to apply the developer all over the extensions. I did not unravel the extensions.


You see how they are in the picture above. I just simply applied the developer from the pink bow downwards. I did not touch the weft or hair above the bow. I like to have the roots dark, makes it easier to blend with my natural hair.

After I applied it, making sure I got every single strand covered. I folded it up in some foil, wrapped a towel around it to promote the heat, and let it be for 24hrs. Rinsed it out, applied some neutralizing shampoo to get all the dye out and then deep conditioned it for a little over an hour.

RESULTS


I just let them air-dry and these were the results. 


Not sure if I still want to dye it or just install them as they are now. Still thinking about it.

Yeah, so that’s how I achieved lighter hair. No dye, just developer and this saved me a TON of money. I typically buy the little packs of dye, Dark and Lovely or Crème of Nature, for about N1200 - N1500 each and for a dye job like this I’d typically use 3-4 packs and for a large bottle of developer I paid  about N1700. Got the Developer at Ebeano supermarket by the way. 

But I will say, different extensions react differently to developers. Some go much much lighter, others don't lighten at all. So it might be worth testing out maybe half a bundle, before going the whole hog.


This hair was sent to me by My Makeup, it’s  3 bundles of their Virgin Peruvian Wavy in lengths 12", 14" & 16". I haven’t installed these yet, but so far I am LOVING the quality. Very very minimal shedding was experienced while lifting this, the hair is still very soft after the process and the wefts are very neatly and tightly done. This isn’t a full review just yet, but so far so good. I’ll just need to see how it holds up when installed e.g. tangling, styling and shedding. So there will be a second part to this review.

Details
Vendor: MyMakeup
Hair Extensions Sent: Virgin Peruvian Wavy
Lengths & Price: 12" (N11,500), 14" (N12,200) & 16" (N13,800)

Ebeano Supermarket: Plot 1B, Block A9, Obafemi Anibaba Street, Lekki Phase 1.(It's basically the first right-turn after you go past Tantalizers on Admiralty Way)


MyMakeup have got a 30% discount right now, off all their Virgin Hair Extensions. This discount lasts only for the month of October. So if you were thinking of getting some extensions, there's no better time!


Hope you enjoyed this post!

Laters,
Ez xxX
Share:

Friday, 31 May 2013

VIRGIN HAIR EXTENSIONS REVIEW - AnneElise Real Hair


Hiya My Lovelies,

When I moved back to Lagos, there  were like a million things I was so worried I won't ever find here. One of them being good quality hair extensions. I had only ever ordered extensions from my trusted stylist Bridget, when I lived in London, and no matter how many times she increased her price by £10 - £15, I would still faithfully repurchase from her. Not because I had money to chuck about, but because I trusted her and knew she won't sell me sub-standard extensions.

I have bought extensions while I have been back, but they have all been of terrible quality, bar one.

A couple months ago, I received an email from a lovely lady called Anne. She said she owned a virgin hair extension company, AnneElise Real Hair*, and her extensions were Argentinian/Spanish mix. Immediately my guard went up, I thought "Nah, I'm not interested. I'm fine with the extensions I've got". I immediately replied with a very skeptical email and a bold disclaimer, saying I will be very honest with my review and if I do not like it I will let her know. Or something along those lines. I also decided to meet with Anne first, look at her products and have a little chat.

About a month after she contacted me, we met-up and BOY, was I impressed. Anne really knows her stuff. We talked for about 30-45mins about just hair! Crazy.

She actually sources her ponytails and then wefts them herself. Ok, well she doesn't personally sew the wefts but she's got her staff to do this. She actually showed me a video on her phone of her girl wefting a ponytail. I was gobsmacked! I never knew what exactly went into creating those 100g bundles we purchase.

One very important piece of information Anne told me was the reason why certain extensions 'Shed'. Now we all do it, when we get our paws on potential hair extensions we want to buy, right after we 'sniff' it (don't act like you don't know what I'm talking about), we proceed to run our fingers through it, tugging a little as we go along. And then if it sheds, we conclude the hair is bad quality.


Anne told me that because hair sheds, it doesn't necessary mean the hair isn't of good quality, it simply means the wefting wasn't done properly and that could just be a waste of perfectly good quality hair. She also mentioned you can then maybe get it 're-wefted'.

OMG, if I go on about all I learnt from Anne during our meeting this will turn into a very 'wordy' post. So on to the photos.


In the bag she sent me, she also gave me some of her branded hair-care merchandise. A lovely clear WashBag which contained a Paddle-Brush and a Shower-Cap.


I have mentioned before I am a sucker for cute packaging/presentation. I LOVE when I can see that the company prides itself on its appearance. This is the cute packing with the pink bow... And it's all PINK!!


And pouch the bundles came in.


These are the bundles I received. Now she gave me samples, so the bundle sizes I received weren't the typical/standard 100g. Typically, one bundle is 100g, and a full-head you'd normally need 300g (3 bundles). But if you love 'big' hair like I do, I go for 5 bundles of (100g each).

Bundles I received:
  • 64g  of  11/12"
  • 55g  of  13"
  • 43g  of  14"
  • 34g  of 15/16"
  • 68g  of  16"
  • 73g  of  17"
Totaling approximately 337g in total.

As you can see from the picture above, the hair colours varied from black to dark brown and a couple light-brown bundles. So I  dyed them a a little, to put some highlights. You'll see them in the pictures below


They come silky-straight. And that's how I wore them the first few weeks. And they were perfect. I did not trim or cut layers into the hair, I had them installed normally with the longer lengths at the bottom and worked my way up to the top with the shortest piece.


After a while, I wanted a change and also to see how versatile the extensions were. So I went to the salon and had it curled.


To achieve these curls, my stylist blow-dried the hair first then curled using a straightener. My stylist, Laurent, can LAY a weave trust me... He's amazing!

Loved the results.


REVIEW
Just one word to describe these extensions... AMAZING! Honestly the BEST quality virgin hair extensions I have ever used. I have had them in for 5weeks now (obviously I have taken them out, conditioned and re-installed over the period), and did not want to write-up a review before the 4-week mark. But I have been bursting at the seams to tell you guys about these extensions. I have already recommended to a few friends and they're loving theirs.They are of very high quality, every hair stylist I've been to has gushed about how the hair is so soft and easy to work with. To say that it doesn't shed at all will be exagerrating a little. But this hair barely sheds, and I am  really holding myself back from saying it doesn't shed at all. I will say minimal shedding occurs with this hair.

It comes silky straight and very easy to maintain, but you can also get it wavy/curly using heat and then flexi-rods in every night, to maintain the curls. The curls will drop a little as the day goes on, but nothing dramatic.

I really have not got anything negative to say about these extensions. I will hand-on-heart recommend this to anyone that asks. And you all know I won't recommend just because I was sent this hair to review. If it were horrible, I would rather not mention it on the blog, than endorse sub-standard products.


DETAILS
AnneElise Real Hair is based in Ikoyi but they deliver anywhere in Lagos. Abuja purchases can be arranged on request.
For Orders and Enquiries:
E: anneeliserealhair@gmail.com
T: (+234) 8103878447

Hope you enjoyed my review. I tried to keep it short, but I really had some info I HAD to share.

Laters,

Ez xxX
Share:
© Beauty In Lagos | All rights reserved.
Blogger Template by pipdig